In Which I Overthink Recipe Cards
This whole newsletter deal has become increasingly cooking-centered over the course of the past year. That’s largely because I realized that if I didn’t figure out how to have a hobby, I’d die. It’s also because I cook for a family now, which is something I’ve always wanted the opportunity to do. I’ve always loved cooking, but over the course of 2019, I’ve gotten to stretch my legs, explore new recipes, fail a few times, and succeed more often than I expected.
My favorite way to cook is improvisational. I love to open the cupboard and put a meal together based on what I find lurking behind the chickpeas. But when a recipe succeeds, or when I want to figure out how to share it with someone else, or when I’m inventing something new and want to plan ahead, or when I’m trying something new and I don’t know enough yet to experiment, I write up a recipe card.
I do each of these by hand on a 3x5” index card. The goal is always to fit the whole recipe on a single card, so I can prop it up on my recipe card box and refer to it easily as I cook. I use a system of notation that breaks down the recipe by process, into no more than four movements (five including kitchen prep). Here’s what it looks like when it’s finished:
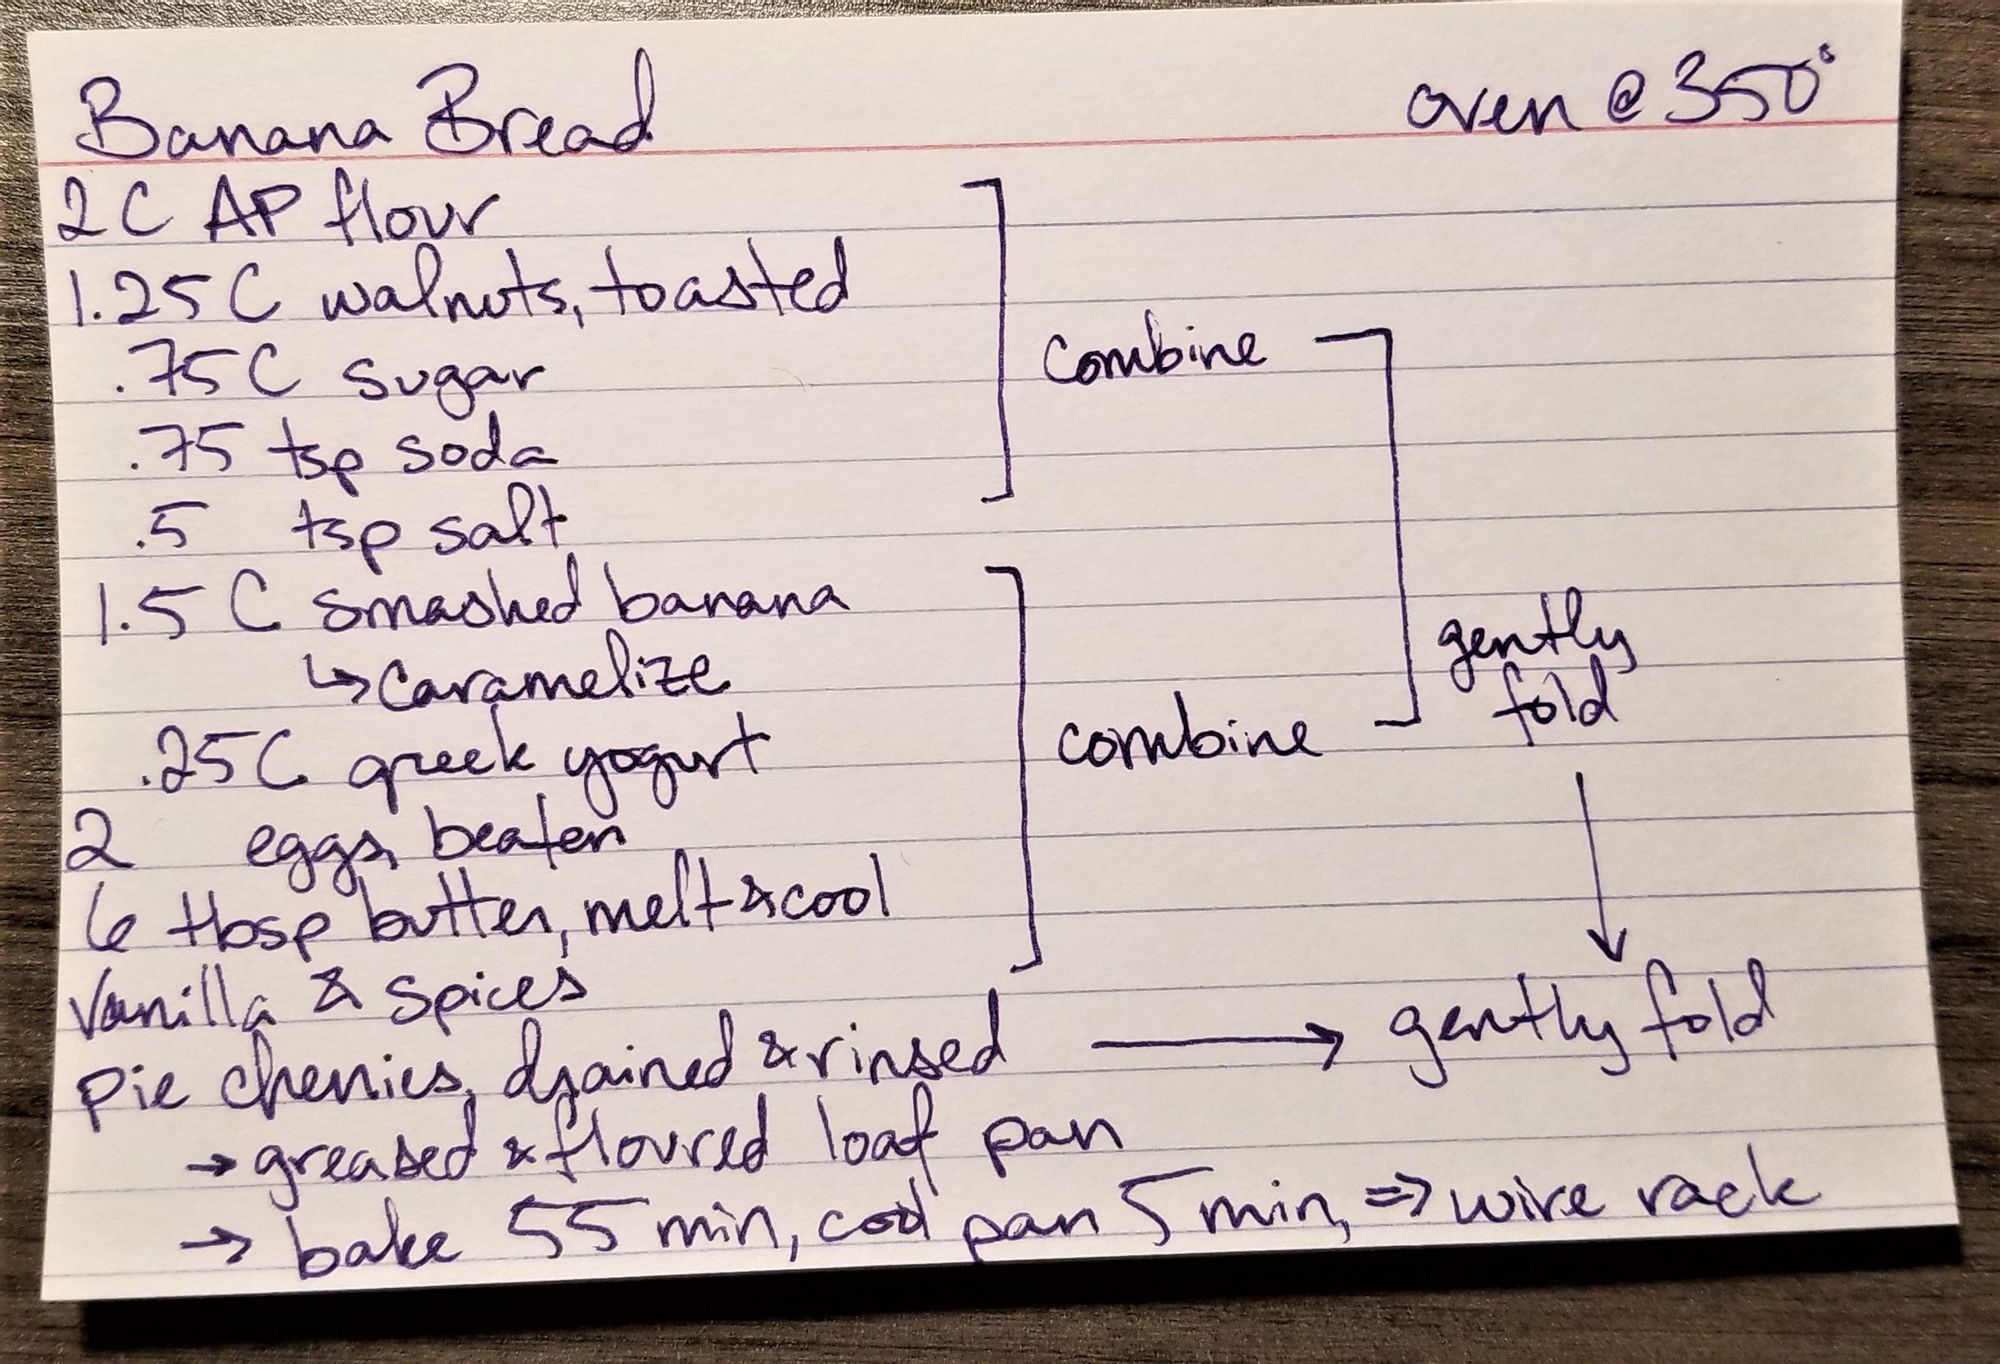
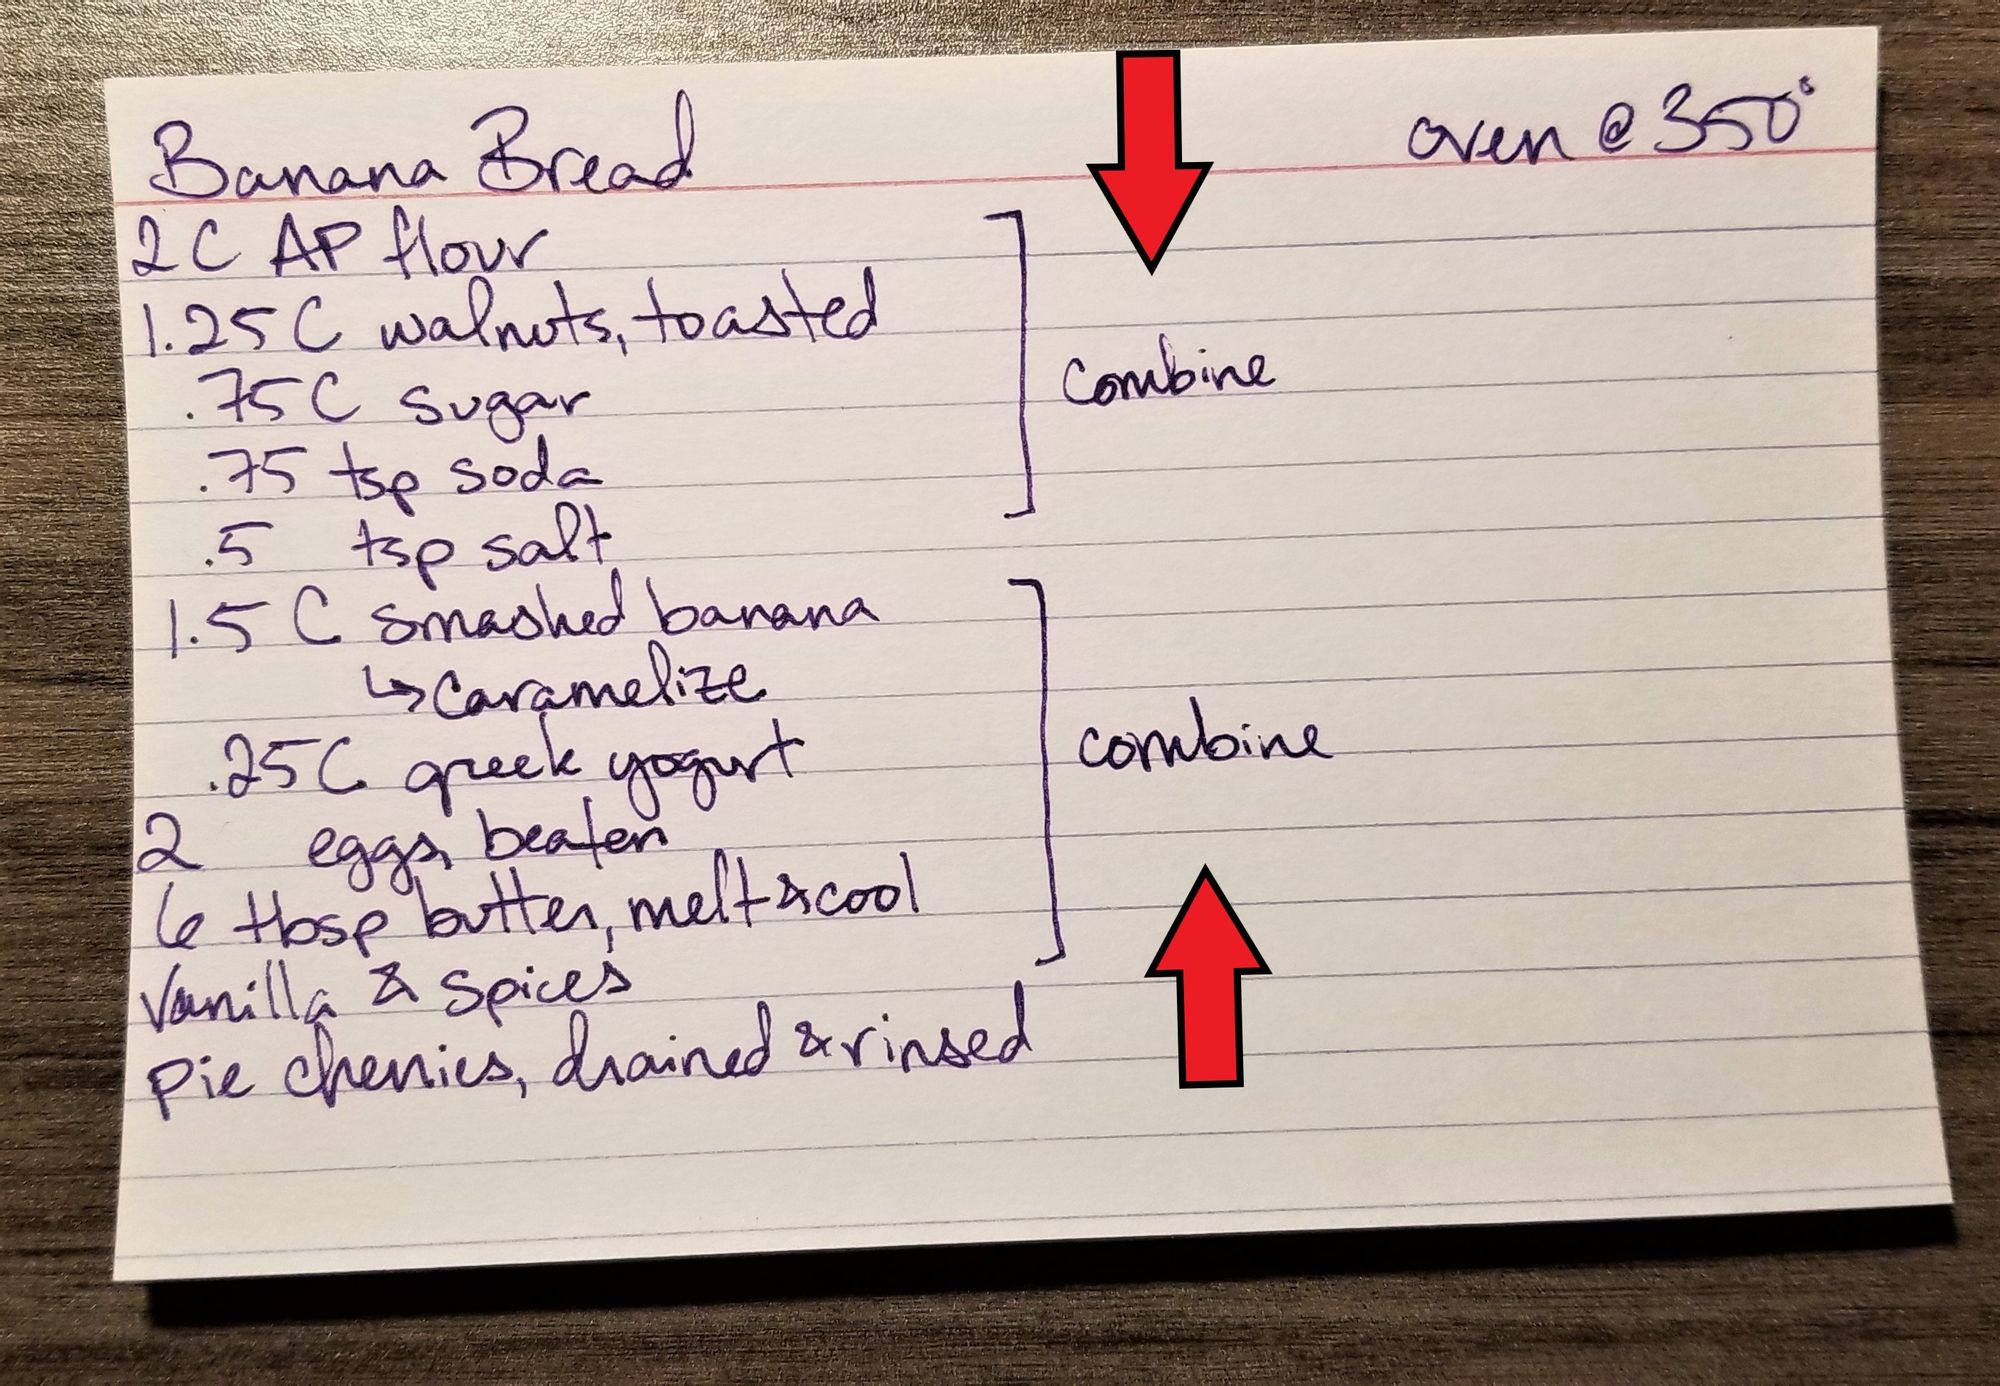
This recipe card contains the full final recipe for this banana bread, which is perhaps my favorite thing to bake and among my favorite things to eat. I was a banana bread hater for a long time, but this banana bread experiment changed me for the better.
Anyway, here’s how this card came together:
Step 1: the name of the recipe.
It goes on the top left, because that’s where we put titles of things. Hot recipe-naming tip: Don’t use the word “crack” when you’re trying to describe how delicious a recipe is. Unless the US government deliberately introduced Barb’s Walnut Bars into a marginalized community with the express intention of destabilizing it, I guess. Even then, you should probably think twice before doing that shit.
Step 2: Preheating/kitchen prep instructions.
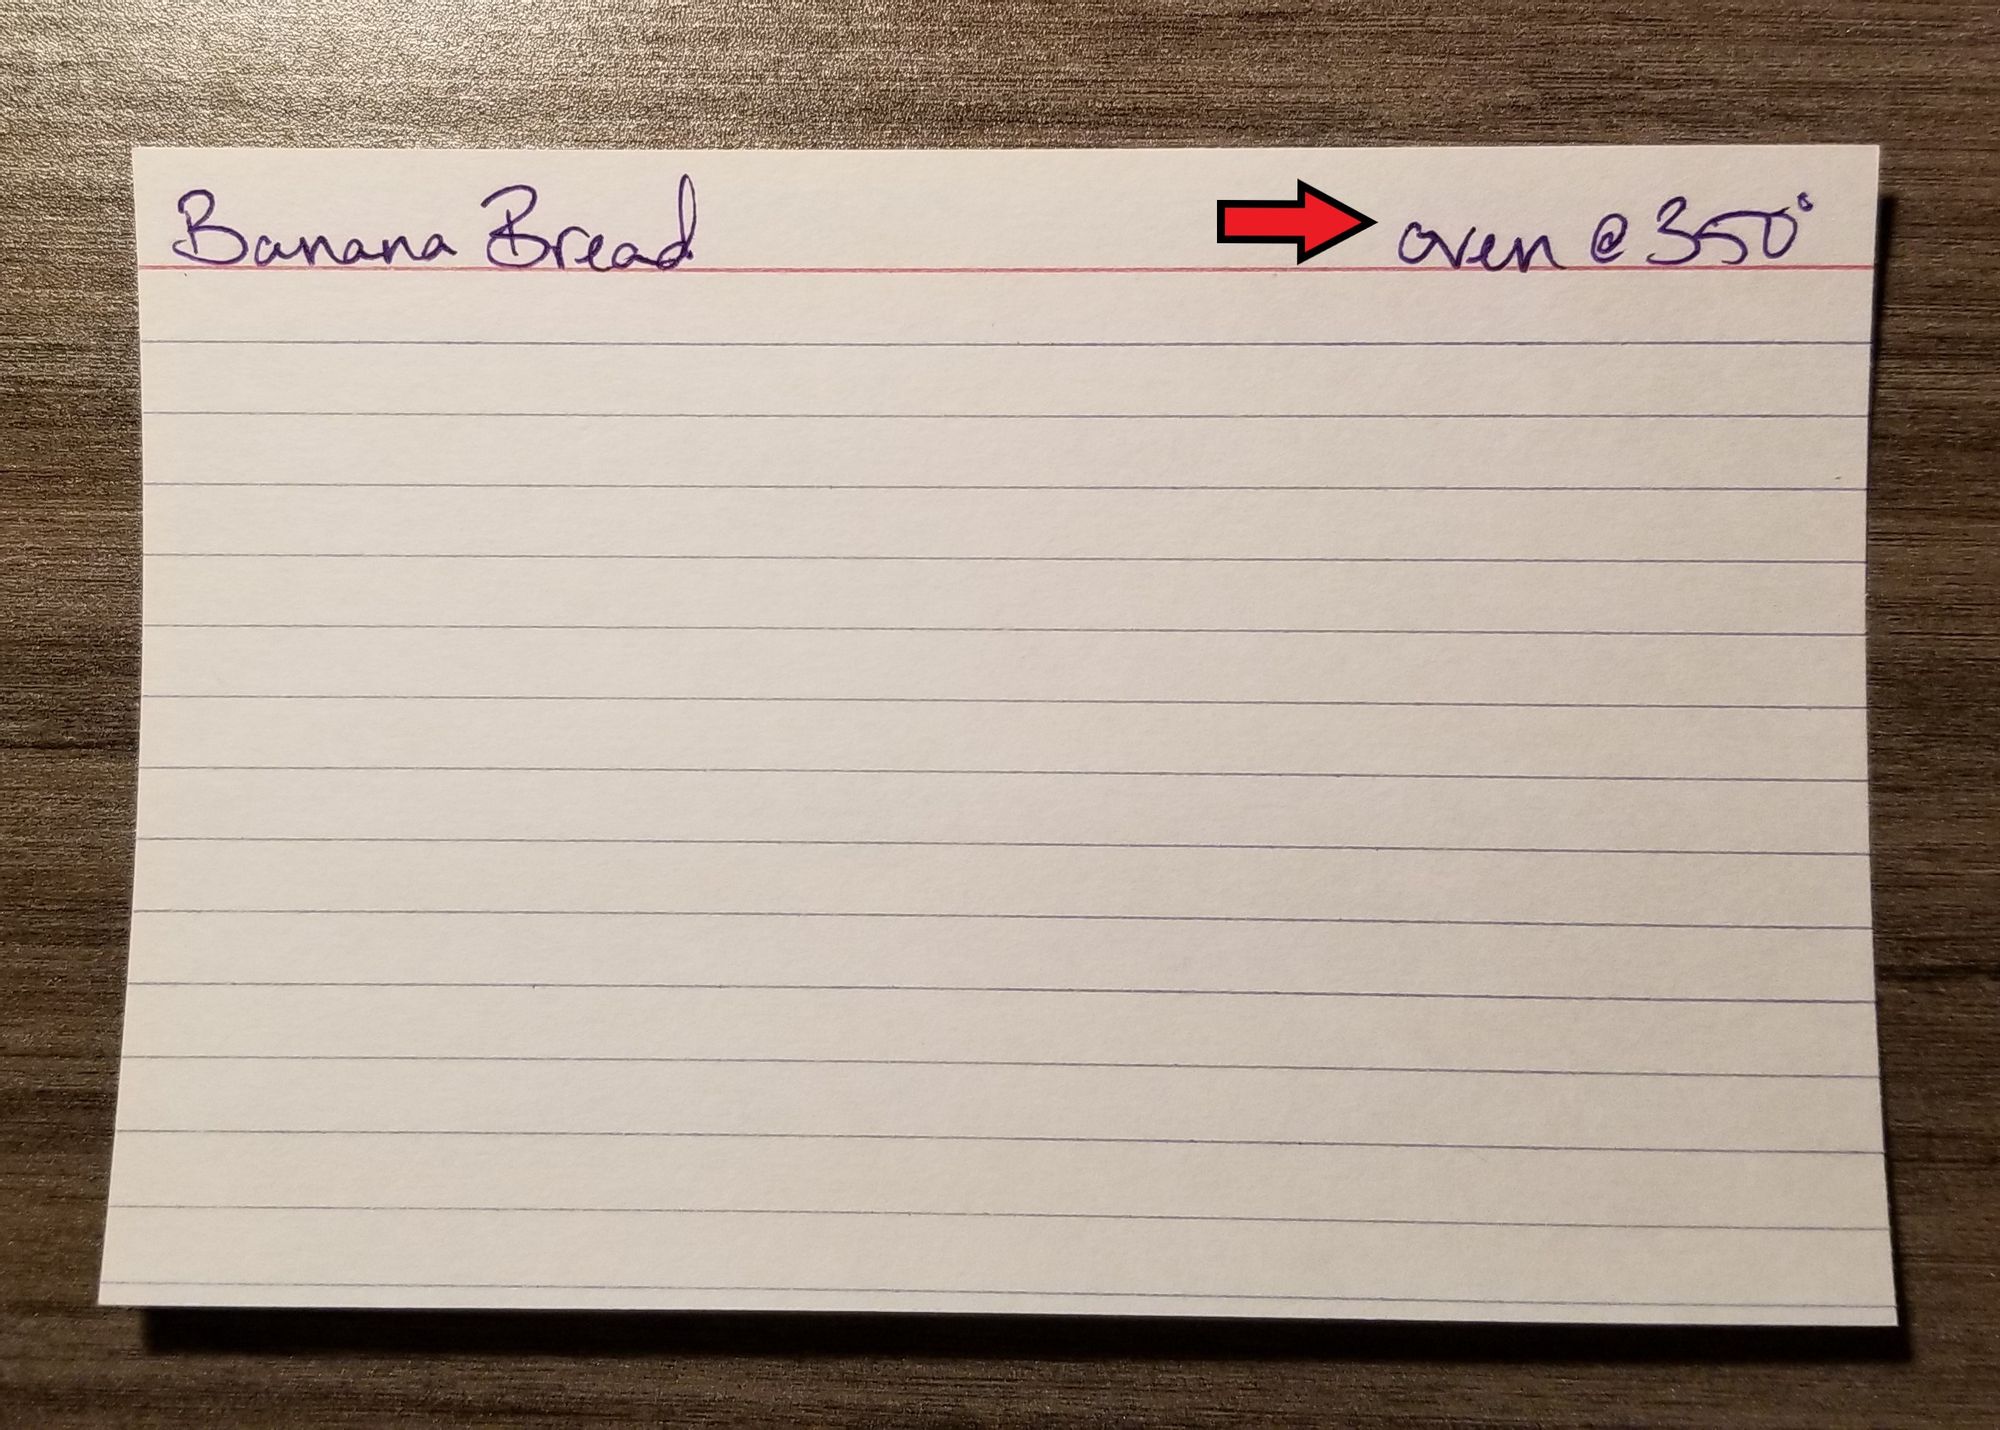
These go on the top right, and include things like preheating the oven, proofing pie crusts, and ordering pizza just in case everything goes horribly awry. Nothing is as annoying to me as a recipe that says “put Thing into a preheated 450° oven” as if I’ve read ahead to the last step before starting to cook. In this kitchen, we don’t think ahead, okay, we just cook stuff.
Step 3: Ingredients/First Movement.
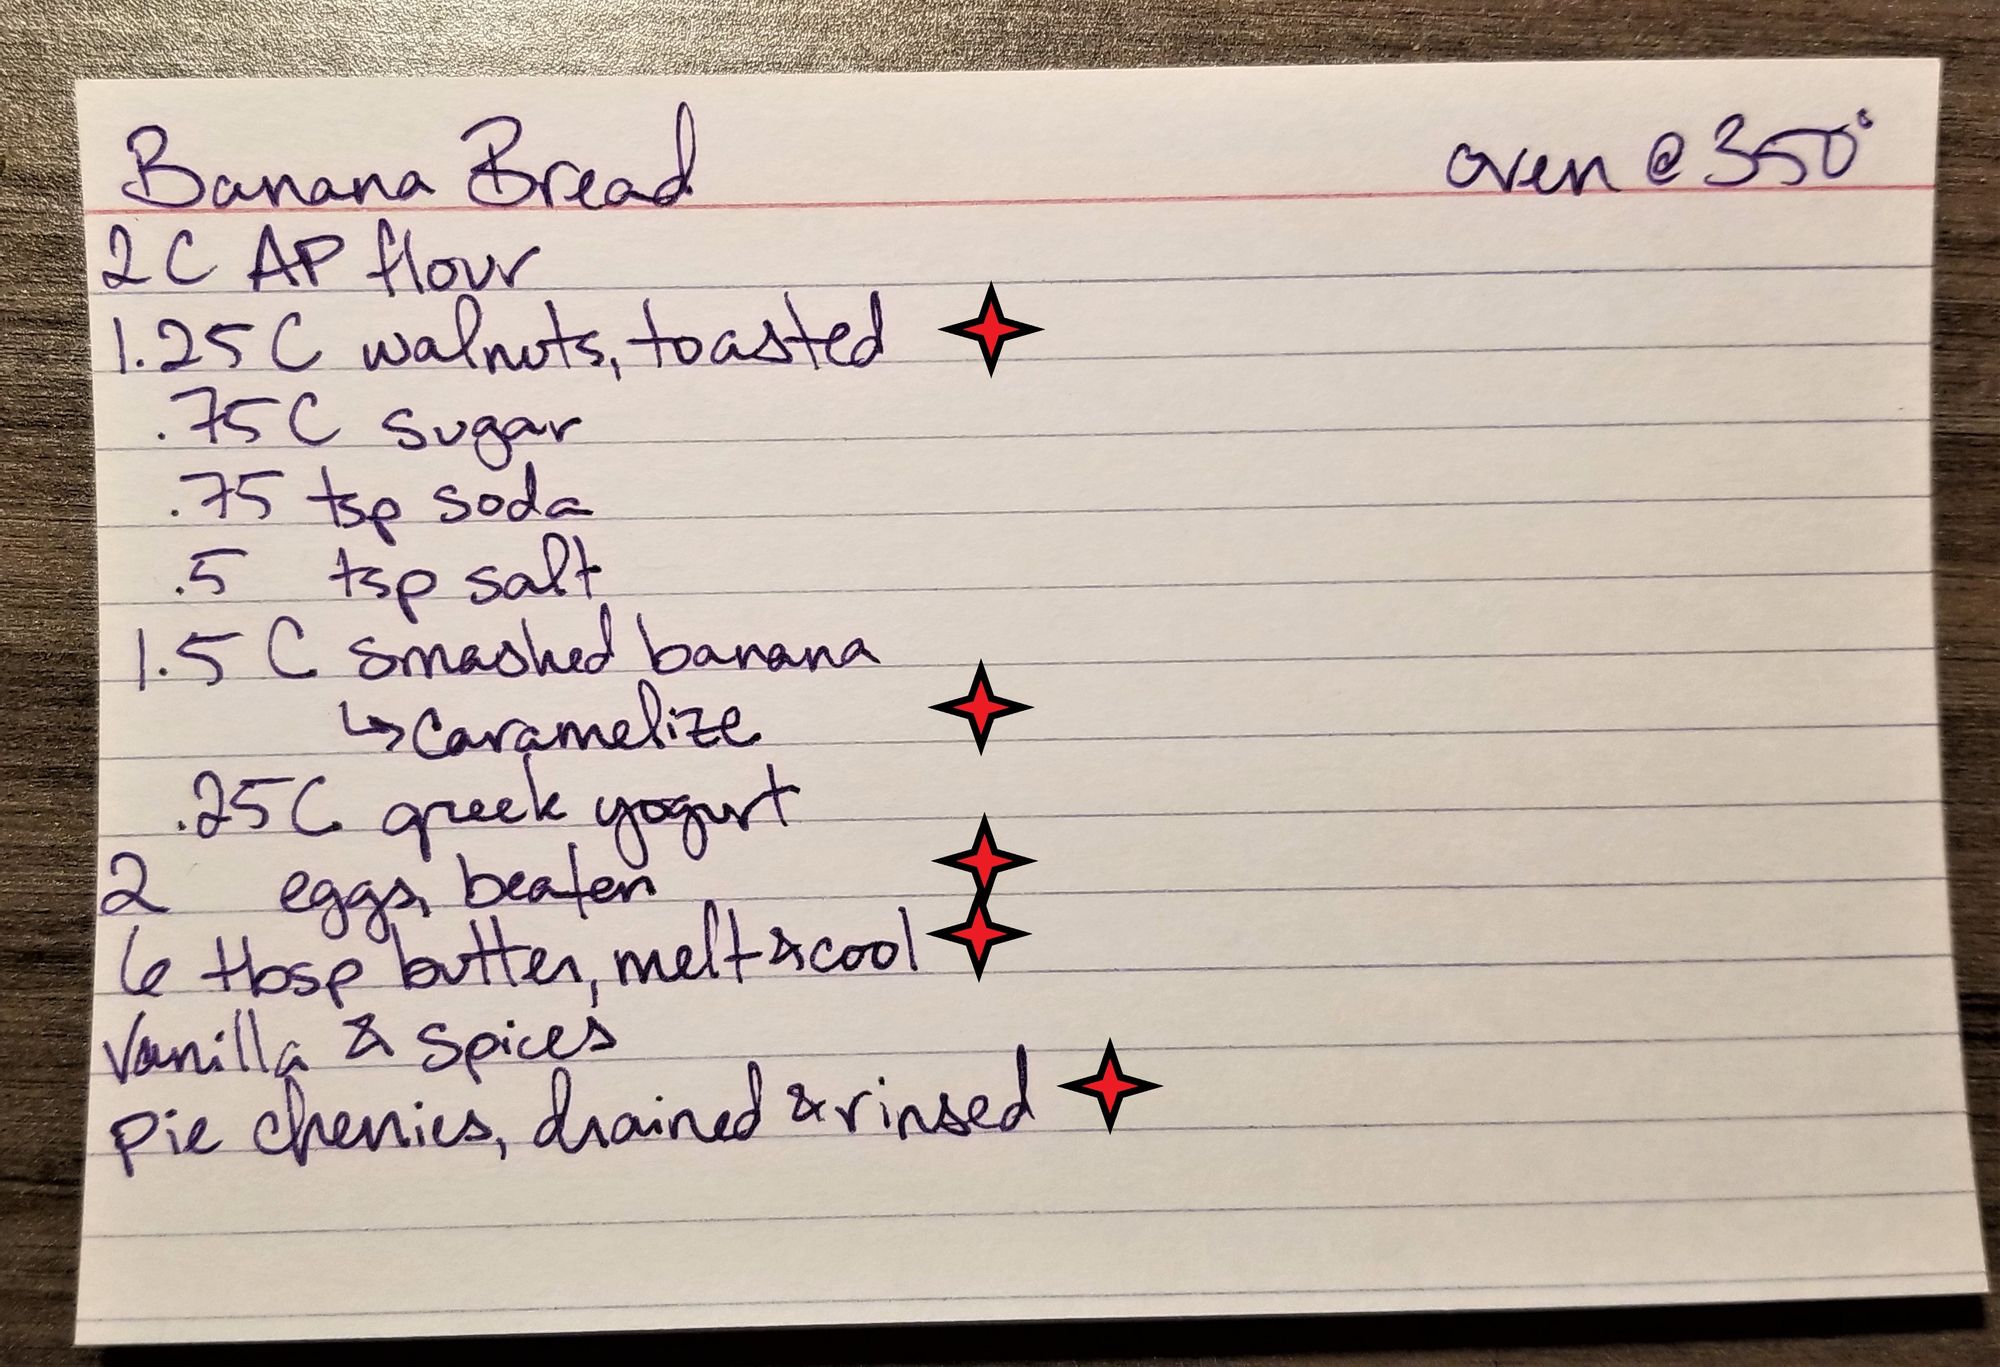
These go in order of use from top to bottom. Most recipes already have things listed in this order, because it’s the smart way to do it, but sometimes this is not the case; I sometimes go through three or four index cards doing the conversions. I also always stick with decimals where possible, except in the case of thirds, which are stupid and annoying. Decimals keep the numbers big enough to see from across the kitchen, which is ideal when one is at a hot stove with a pot of banana that wants more than ANYTHING to boil over.
You’ll also note that there are prep instructions in this section, like “walnuts, toasted” or “smashed banana -> caramelize.” This is mostly for economy of space. It’s also the reason I think of the ingredients section of a recipe as the first movement — gathering and preparing ingredients absolutely counts as cooking, and forgetting that is one of the biggest reasons cooking becomes stressful. If you think of this section as instructions, rather than a simple list of items, you’ll remember to incorporate preparation time and effort into your cooking, and you’ll have a much better time.
Step 4: Second Movement.
This is where the Cooking Instructions section of most recipes will start. In this banana bread recipe, those cooking instructions involve combining the wet and dry ingredients separately. These things both need to occur before the next part of the cooking process can start, so they’re aligned. It’s still a form of prep, because minimal chemical-level changes are happening to the food.
Step 5: Third Movement.
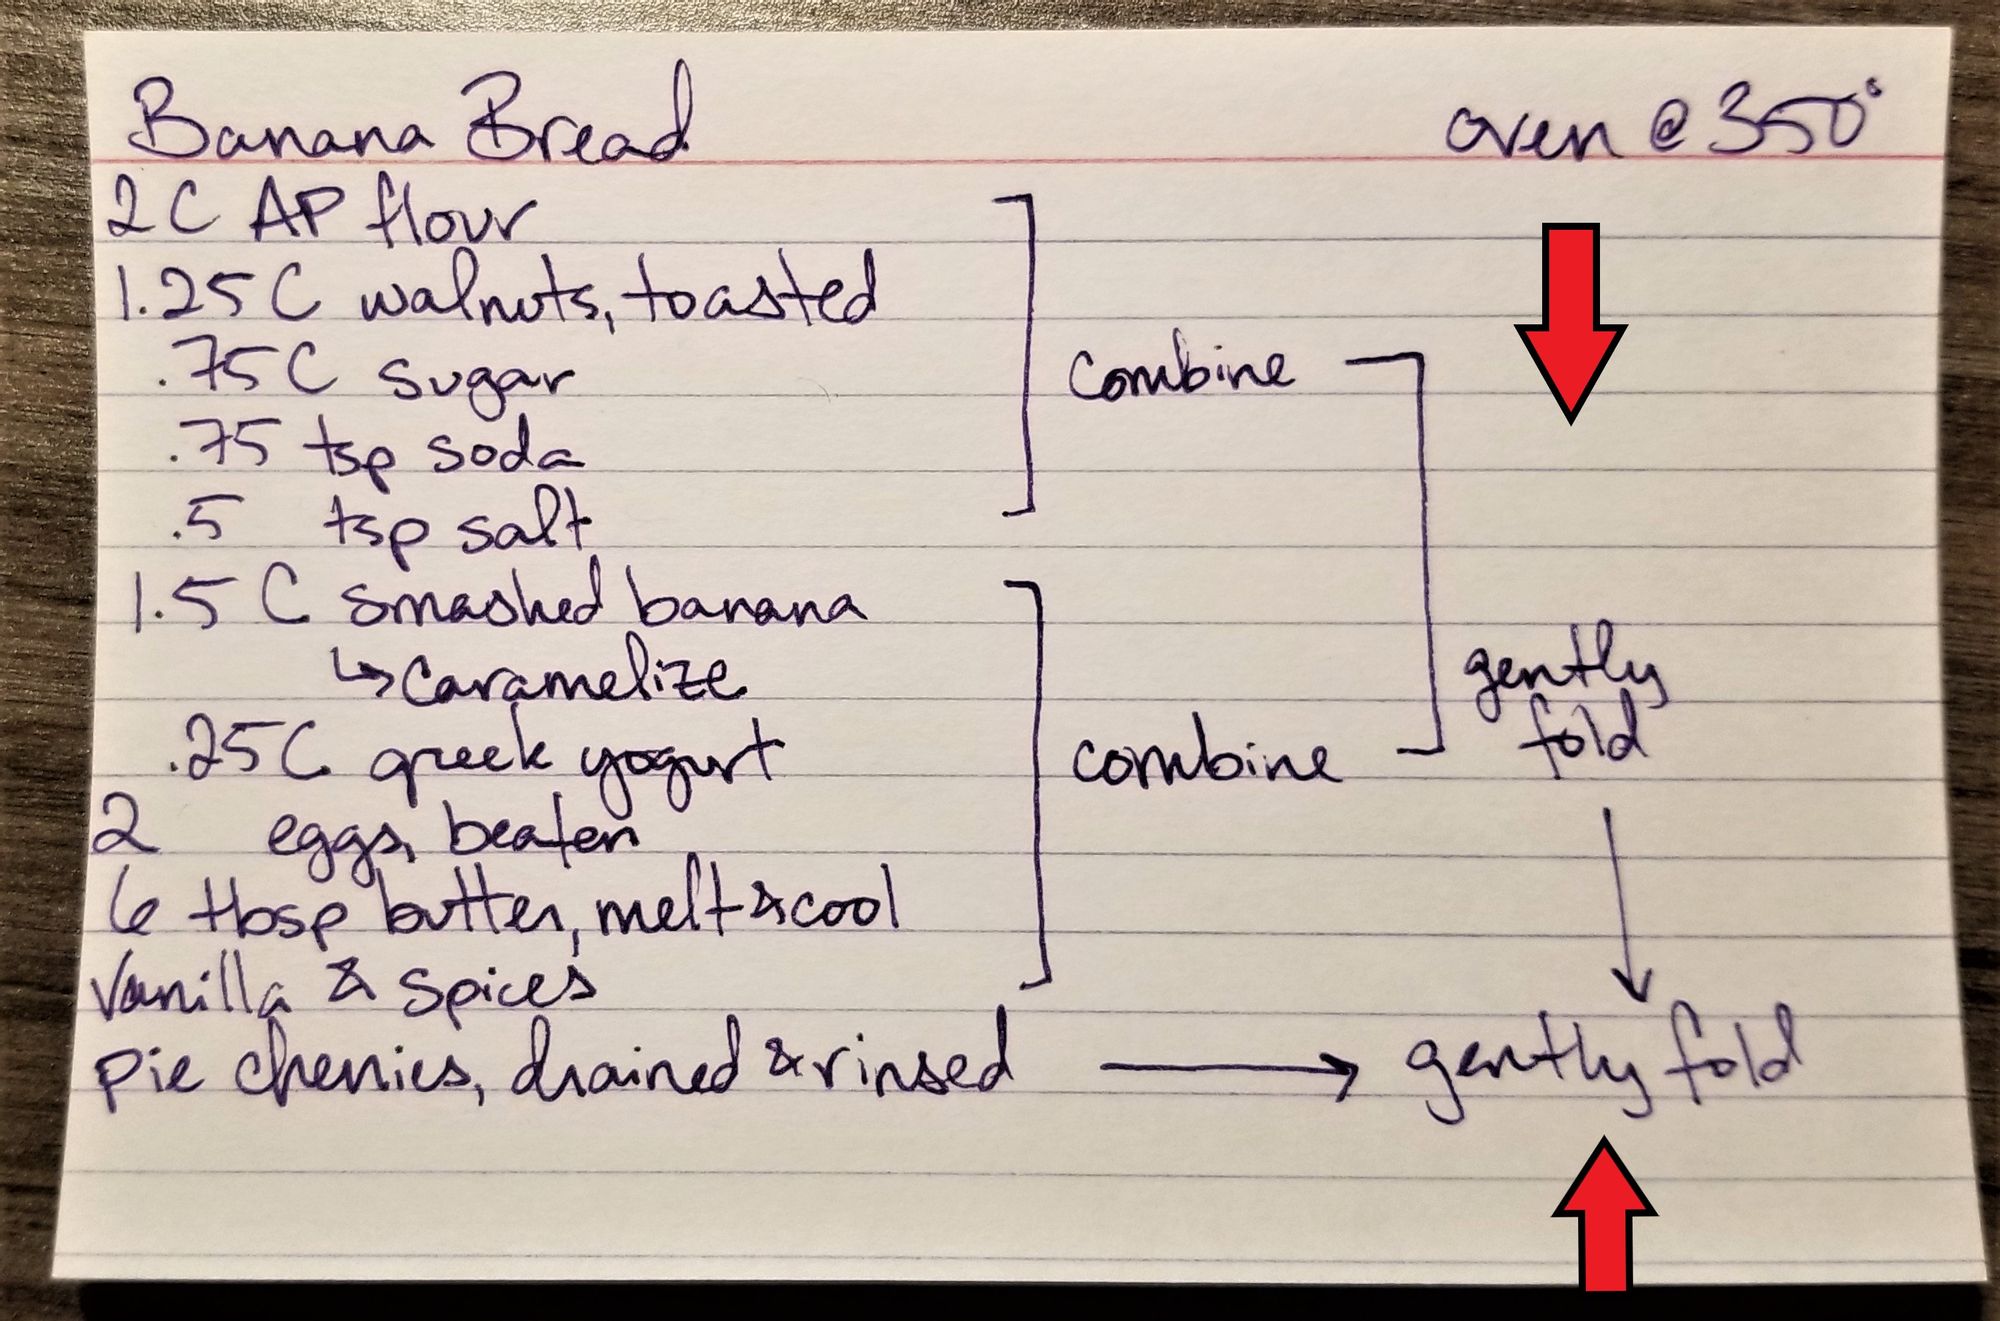
This is the part of the recipe where things come together. In many ways, it’s the moment where preparation-cooking becomes active-cooking, the part that starts to feel alchemical. This is the part you might feel nervous about letting a little kid help you with. This is also the moment when the recipe usually becomes very time sensitive; this section of the recipe card is perfect for combining wet and dry ingredients, putting the components of a casserole together, and finalizing sauces. In this recipe, two things are in this column: combining the wet and dry ingredients, and adding the prepared pie cherries to the batter. The arrows in the column indicate that these steps should happen in a particular order.
Step 6: Final Movements.
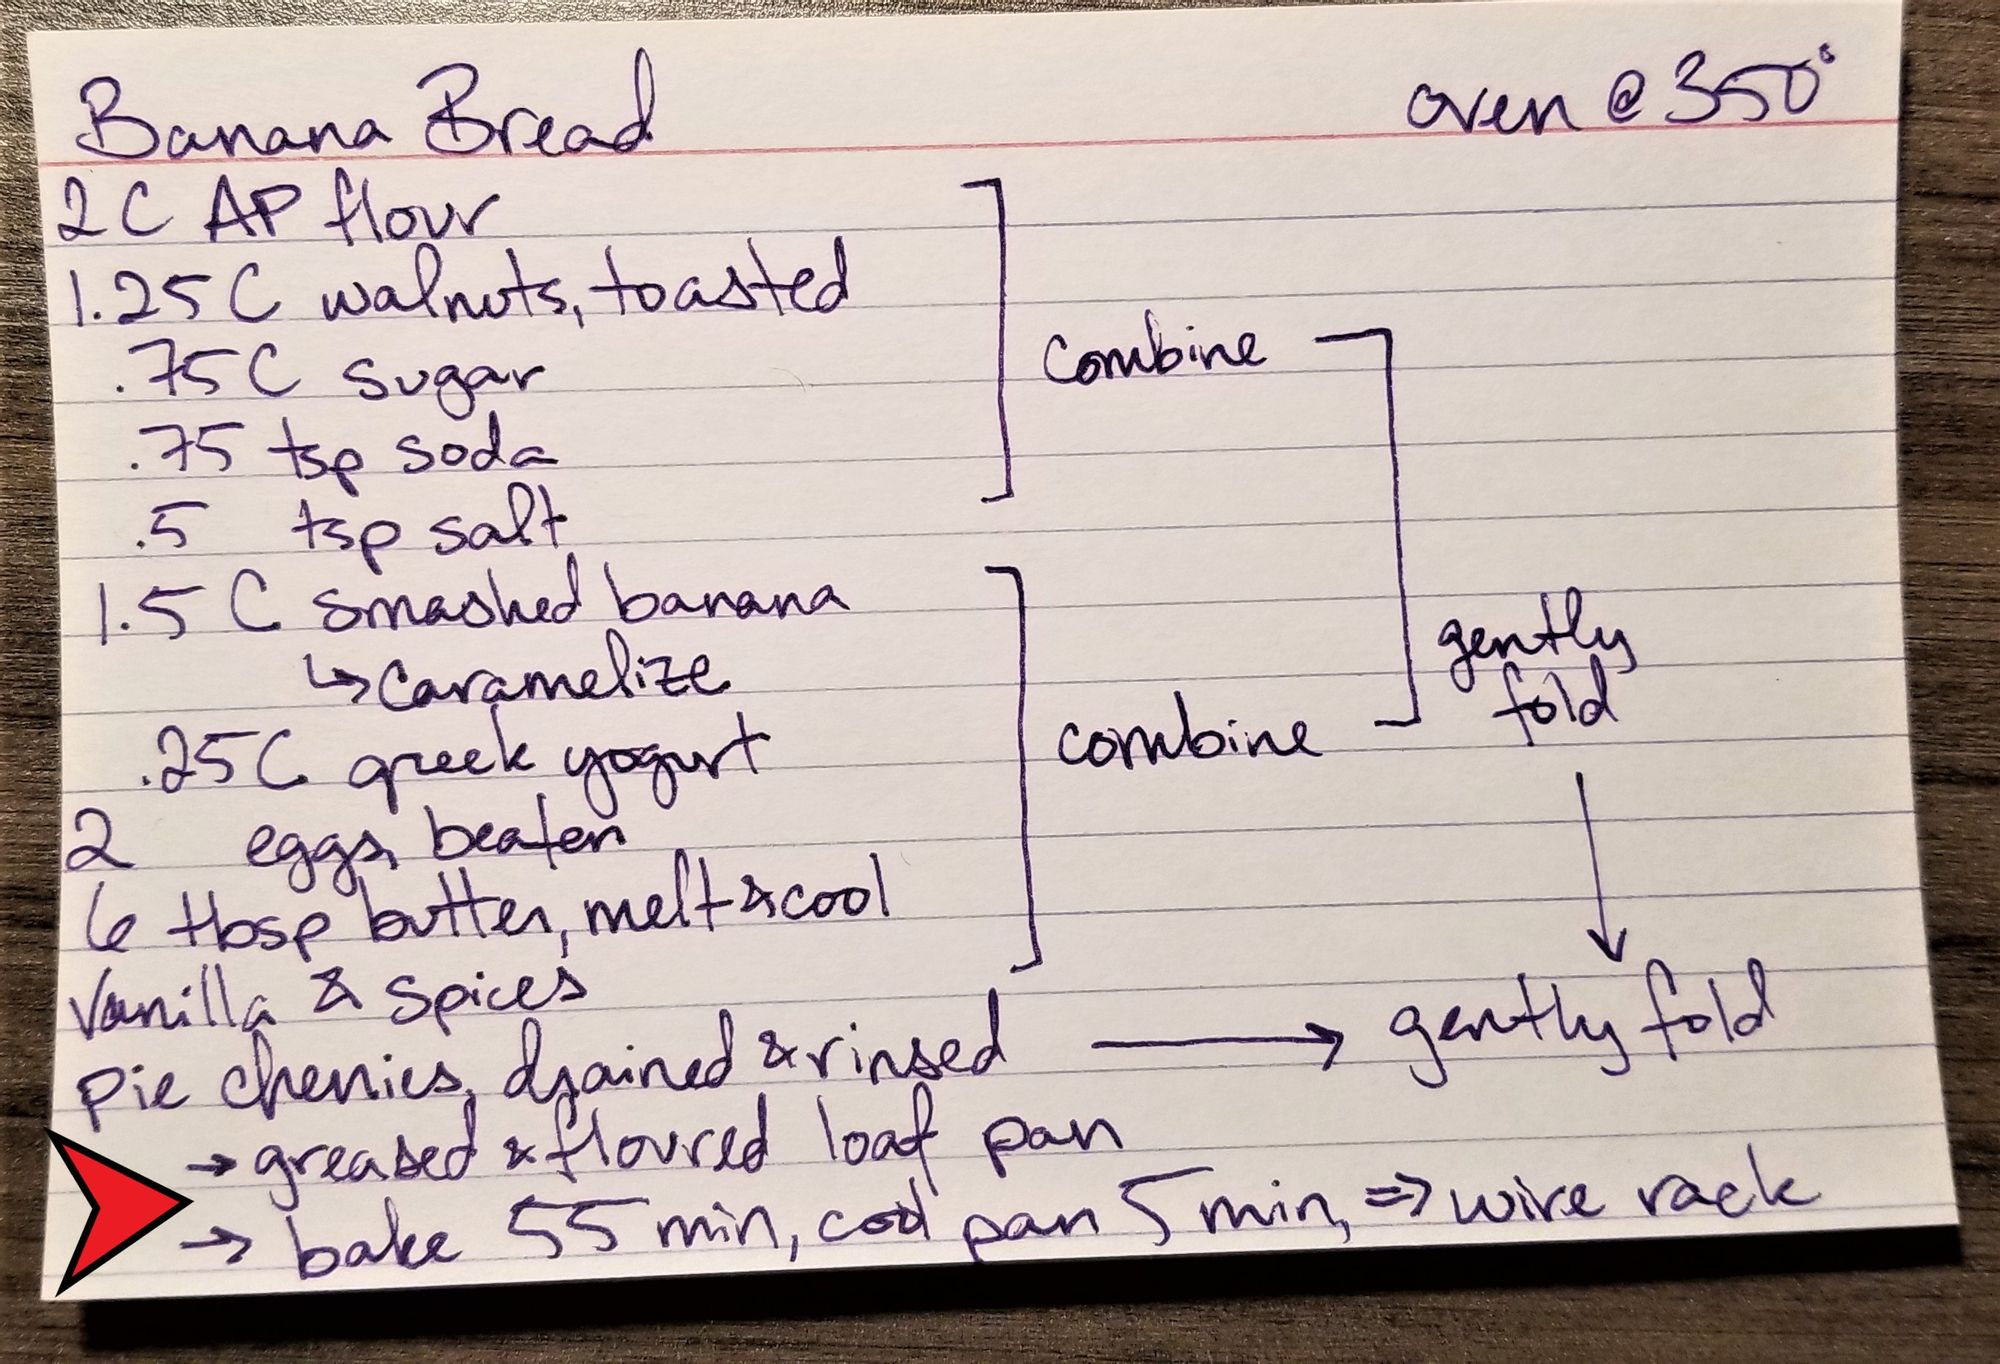
At the bottom of the card, I usually note a few last steps for finishing a dish. This can include a baking or broiling time, notes on cooling, or serving suggestions. I also sometimes put variations here, like “add dried fruit if you feel fancy” or “rice flour works for GF.”
Step 7 (optional): notes.
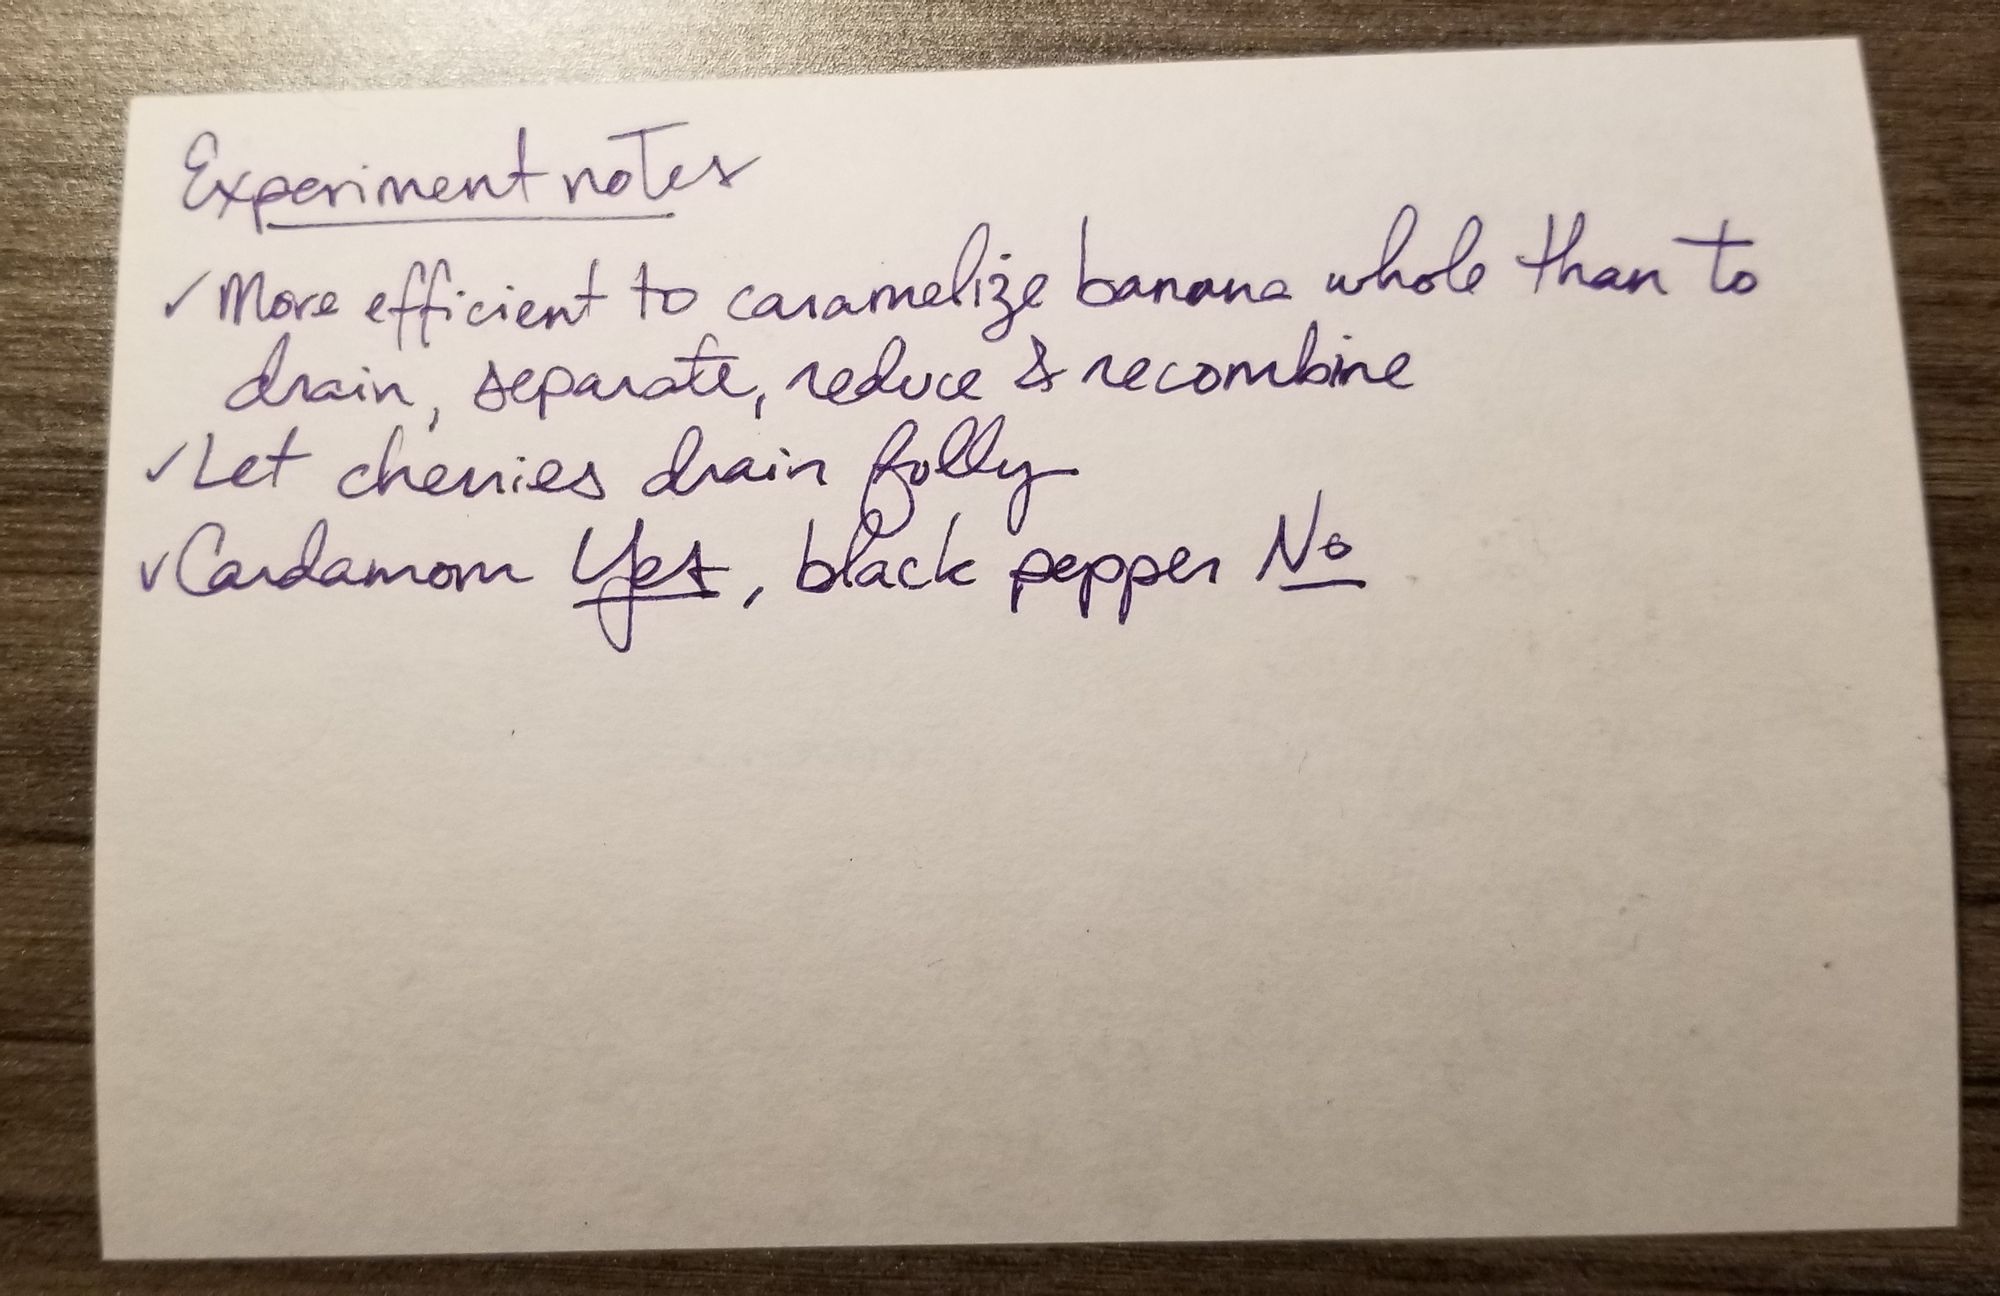
These go on the back of the card because I’m an insufferable fidget and I can’t leave well enough alone. These are the notes I take as I make a recipe again and again, trying to find the best possible version of it. None of these things should be necessary once the cooking process has begun.
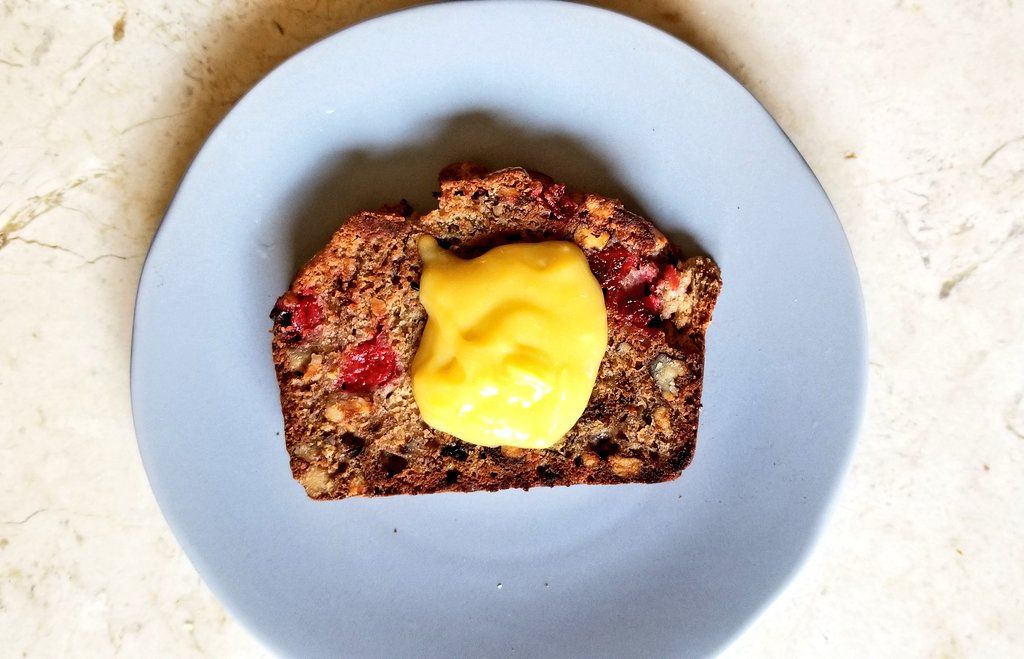
That’s the whole card! It’s my favorite way to break down a recipe. As a reward for hanging in through this whole thing, here’s a picture of banana bread with lemon curd on it, because we all deserve to look at beautiful food sometimes:


Member discussion